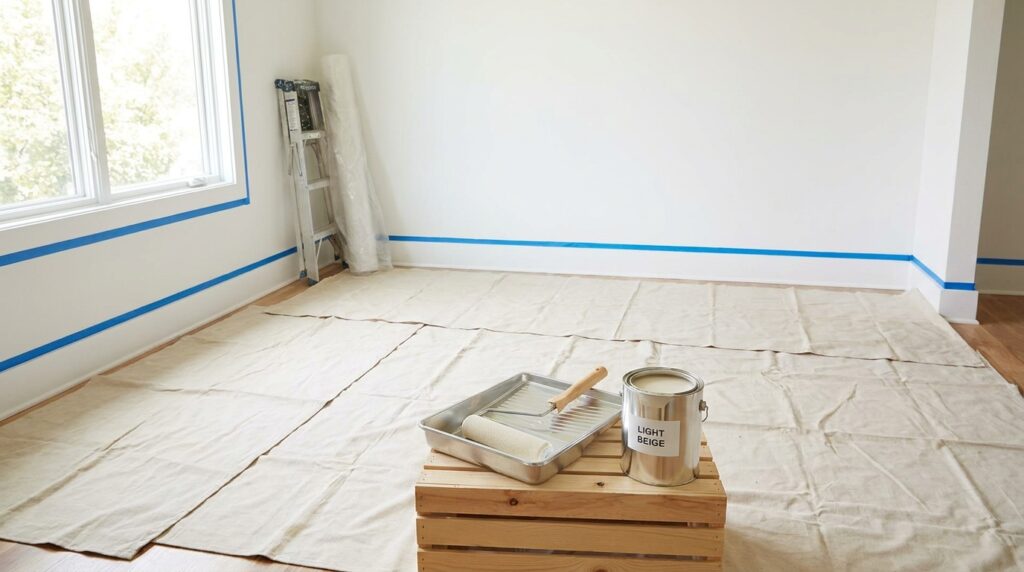
Painting a room without mess comes down to preparation: clear and cover the room, clean and tape the surfaces, then paint in a fixed order from the top down. Most drips, splashes and wobbly lines happen because a step was rushed before the lid came off the tin. For a first room, allow a full weekend, since each coat needs time to dry.
Table Of Content
Gather Your Tools Before You Start
Having everything ready stops you walking through the house with a wet brush in your hand. A basic kit for one room:
- Paint for the walls and, if needed, a separate paint for woodwork
- A roller, a roller tray and an extension pole
- A medium-sized angled brush for edges and corners
- Painter’s tape, which is masking tape made to peel off cleanly
- Dust sheets for the floor and plastic sheeting for furniture
- Filler, a filling knife and fine sandpaper for small holes
- A bucket, a sponge and mild detergent or sugar soap
- A sturdy stepladder
- Rags or a damp cloth for drips
To work out how much paint you need, multiply the width of each wall by its height, add the walls together and compare the total with the coverage figure printed on the tin. Coverage varies between brands and colours, and most rooms need two coats.
Clear and Protect the Room
Move as much furniture out of the room as you can, and push the rest into the middle under plastic sheeting. Cover the whole floor with dust sheets, right up to the skirting boards. Fabric dust sheets are less slippery underfoot than plastic, which matters when you are on a ladder.
Take down curtains, pictures and hooks, and keep any screws in a labelled bag. Cover light switches and sockets with painter’s tape rather than taking them apart. If a switch or socket is loose, cracked or damaged, leave it alone and ask a qualified electrician to deal with it.
Clean, Fill and Sand the Walls
Paint sticks best to a surface that is clean, dry and smooth. Wash the walls with warm water and a little mild detergent or sugar soap, paying attention to the areas near the cooker, light switches and door handles, where grease builds up. Let the walls dry fully.
Fill small holes and cracks, leave the filler to dry for as long as the packet says, then sand it flush with fine sandpaper. Wipe off the dust with a damp cloth. If the paint maker recommends it, spot-prime larger filled patches so they don’t show through as dull marks.
Tape the Edges Properly
Painter’s tape gives you straight lines where the walls meet the ceiling, skirting boards and window frames. Apply it in lengths of about an arm’s width, and press the edge down firmly with a fingernail or a putty knife so paint can’t creep underneath.
Tape helps, but it isn’t a guarantee. On very uneven surfaces, a steady hand with an angled brush often gives a cleaner line.
Paint in the Right Order
Work from the top of the room down, so any drips land on surfaces you haven’t painted yet. The usual order looks like this:
| Order | Surface | Tip |
|---|---|---|
| 1 | Ceiling | Use a roller on an extension pole and work away from the window |
| 2 | Walls | Brush the edges first, then roll the main area |
| 3 | Woodwork | Skirting boards, door frames and window frames come last |
| 4 | Doors | Paint once the walls are dry, so you don’t brush against wet paint |
Cutting In and Rolling
“Cutting in” means brushing a band of paint a few centimetres wide along edges and corners, where the roller can’t reach. Do this on one wall, then roll that wall while the brushed edge is still wet, so the two blend without visible lines.
Load the roller evenly by running it back and forth on the ridged part of the tray. An overloaded roller drips and splatters. Roll in overlapping sections, and finish each area with light strokes in the same direction.
Keep a damp cloth in your pocket the whole time. A drip wiped up while wet takes a second, while a dried one needs sanding and a touch-up.
Let It Dry, Then Apply the Second Coat
The time between coats depends on the paint, the room temperature and the humidity, so follow the recoat time on the tin rather than guessing. A second coat applied too early can drag or lift the first.
Between coats, wrap your roller and brush tightly in cling film or a plastic bag so they don’t dry out. That saves you washing them halfway through the job.
Remove the Tape and Clean Up
Take the tape off once the paint is dry to the touch. The makers of ScotchBlue painter’s tape suggest pulling it back on itself at about a 45 degree angle, and scoring along the edge with a putty knife or blade first if paint has bridged across the tape, so the paint line doesn’t tear.
Clean brushes and rollers as the tin directs. Water-based paints wash out with water, while solvent-based paints need the cleaner named on the tin. Don’t pour leftover paint down the sink. Keep a small amount, tightly sealed, for touch-ups, and ask your local council or waste service how to dispose of the rest.
Keep the Room Well Aired
Fresh air matters both during and after painting. Open the windows and, if you can, use a fan to blow air out of the room. The US Environmental Protection Agency advises keeping windows open for two to three days after painting, and suggests keeping young children and people with breathing problems out of freshly painted rooms where possible. Take regular fresh-air breaks yourself while you work.
Once everything is dry, put the furniture back carefully, lifting rather than dragging it across the floor. Leave the tin’s colour name and code in a safe place, so you can buy an exact match when a wall needs a touch-up later.