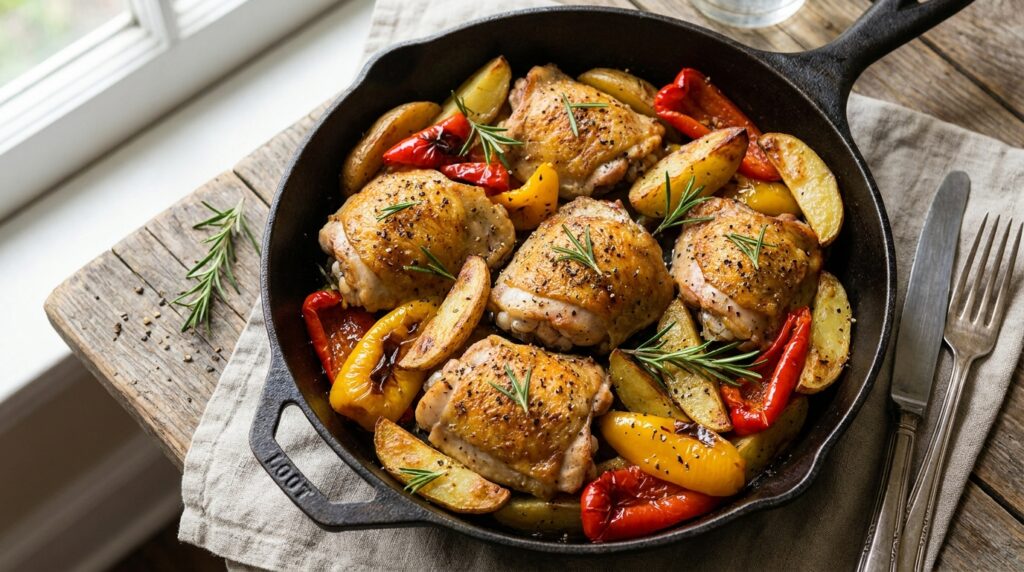
This one-pan dinner roasts chicken thighs, potatoes, peppers and red onion together on a single baking tray in about 50 minutes, with only 15 minutes of hands-on work. It serves four. The potatoes get a short head start so everything finishes at the same time, and smoked paprika, garlic and lemon do most of the flavour work. The only washing up is one tray and a chopping board.
Table Of Content
Ingredients
This makes 4 servings. Use the largest baking tray you have, ideally about 30 x 40 cm (12 x 16 inches), so nothing is crowded.
- 8 bone-in, skin-on chicken thighs (about 1.2 kg or 2 lb 10 oz in total)
- 750 g (1 lb 10 oz) small potatoes, halved, or larger ones cut into 4 cm chunks
- 2 red or yellow peppers, cut into strips about 3 cm wide
- 1 large red onion, cut into 8 wedges
- 4 garlic cloves, crushed
- 3 tablespoons olive oil
- 2 teaspoons smoked paprika
- 1 teaspoon dried oregano
- 1½ teaspoons salt, divided
- ½ teaspoon ground black pepper
- 1 lemon
- A small handful of fresh parsley, chopped (optional)
Equipment
You need one large baking tray or roasting tin, a chopping board kept only for the raw chicken, a sharp knife, a large bowl and, ideally, a digital meat thermometer. The thermometer is the surest way to know the chicken is cooked, and it takes the guesswork out of roasting.
Method
1. Heat the Oven and Start the Potatoes
Heat the oven to 220°C (200°C fan), 425°F or gas mark 7. Put the potatoes on the baking tray, drizzle with 1 tablespoon of the olive oil, sprinkle with ½ teaspoon of the salt and toss with your hands. Turn the cut sides down, which helps them brown, and roast for 15 minutes.
2. Season the Chicken
While the potatoes roast, put the chicken thighs in a large bowl. Add the remaining 2 tablespoons of oil, the crushed garlic, smoked paprika, oregano, black pepper, the remaining 1 teaspoon of salt and the finely grated zest of the lemon. Mix well so every piece is coated, rubbing some of the mixture under the skin.
Do not rinse the chicken first. The UK’s Food Standards Agency advises against washing raw chicken, because splashing water spreads bacteria such as campylobacter onto your hands, the sink and the worktop. Wash your hands with soap and hot water after handling it.
3. Add Everything to the Tray
Take the tray out of the oven and push the potatoes slightly to the sides. Add the peppers and onion wedges, toss them in the oil already on the tray, then sit the chicken thighs on top, skin side up and spaced apart. Leaving gaps lets hot air move around each piece, so the skin crisps instead of steaming.
4. Roast Until the Chicken Is Cooked Through
Return the tray to the oven and roast for 30 to 35 minutes, until the chicken skin is deep golden and crisp and the potatoes are tender when pierced with a knife. Oven temperatures vary, so check the chicken rather than relying only on the timer.
Test the thickest thigh with a thermometer pushed into the meat, not touching the bone. You are looking for at least 74°C (165°F).
5. Rest and Finish
Let the tray stand for 5 minutes out of the oven. Cut the zested lemon in half, squeeze the juice over the chicken and vegetables, and scatter the parsley on top. Serve straight from the tray, spooning over the juices that collect in the bottom.
How to Tell the Chicken Is Safe to Eat
Chicken is safely cooked when the thickest part reaches 165°F (74°C), the safe minimum temperature for all poultry set by the US Department of Agriculture. A thermometer gives you a clear answer, and the USDA recommends using one rather than judging by colour.
If you do not have a thermometer, the Food Standards Agency’s test is to cut into the thickest part of the meat. It should be steaming hot all the way through, with no pink meat, and the juices should run clear. If you see pink, put the tray back in the oven for another 5 minutes and check again.
Keep raw chicken away from food that will not be cooked. Use a separate board and knife for it, and wash them in hot, soapy water before using them for anything else, including the lemon and parsley.
Swaps and Variations
The recipe adapts easily to what you have in the kitchen:
- Boneless thighs: they cook faster, so add them for the last 20 to 25 minutes and check with a thermometer.
- Sweet potatoes: use the same weight cut into 3 cm chunks, and skip the 15-minute head start, as they cook more quickly.
- Chickpeas: add a drained 400 g tin of chickpeas with the peppers for extra protein and crunch.
- Different spices: swap the paprika and oregano for 2 teaspoons of ground cumin and 1 teaspoon of ground coriander, or for 1 tablespoon of a curry powder you like.
- More vegetables: courgette chunks and cherry tomatoes work well, but add them for the last 15 minutes only so they keep their shape.
Serve it with a green salad, a spoonful of plain yoghurt mixed with garlic and lemon, or crusty bread to mop up the juices.
Storing Leftovers
Put leftovers in the fridge within two hours of cooking, in a shallow covered container, as the USDA advises. The UK’s Food Standards Agency says to eat leftovers within two days, while the USDA gives three to four days, so follow the guidance used where you live and choose the shorter time if you are unsure.
Reheat leftovers only once, until steaming hot all the way through, which is the Food Standards Agency’s advice. Leftover chicken is also good cold the next day: pull the meat off the bone and add it to a salad or a wrap with the roast peppers.